
After having issues with weed growth on the hull spoiling some of our breaks to the boat I have decided that anti fouling alone is insufficient for our particular needs in the Med.
Checking out Utra Sonic Anti Fouling on forums etc provided a whole host of subjective comments from a lot of people who have never actually fitted any of the products available on the market. Not a lot of help really!!
I therefore decided to conduct my own due diligence; and after separating the wheat from the chaff I decided to go with the product designed and manufactured by Ultra Sonic Anti Fouling I selected this company as they were very helpful and informative; plus it was patently obvious they were not simply trying to get an order but were answering my questions honestly and openly (as opposed to some others !!) and they offered a 3 year warranty.
The process is simply to abrade back the paint and rough fibre glass until there is a smooth flat surface…….no doubt this will be easier on a new boat but on an old ruggedly built boat like Sun Dog this took a bit of doing due to a rough finish on the inside of the hull. Boy is fibre glass tough material!…….so out went the plan of a sanding block with 80 grit paper, and out came the wallet for the purchase of a sanding machine !!
This is a photo of the starboard forward unit – I had used tape to hold the flange in place while the epoxy cured for 24 hours. Once you have a smooth flat surface, you simply epoxy the flange to the hull and into which the transponder will screw…….as a safeguard I used Vaseline to coat the threads to avoid any potential issues should any epoxy manage to get into them.
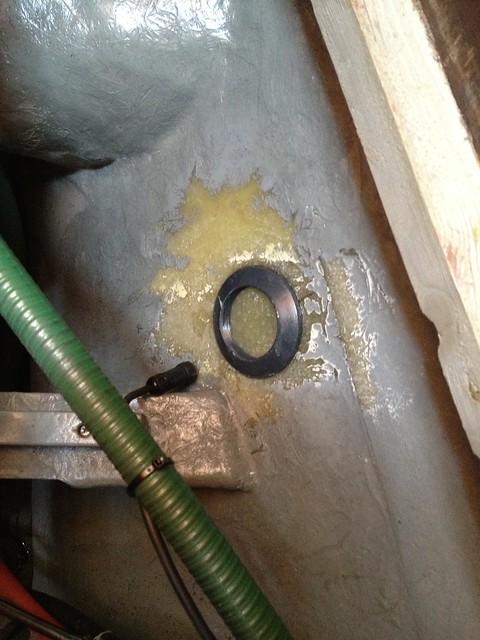
Forward unit with the transponder screwed in and cable connected.

Similar was done in the port side aft and, after everything was completed, a coat of paint finished the job.
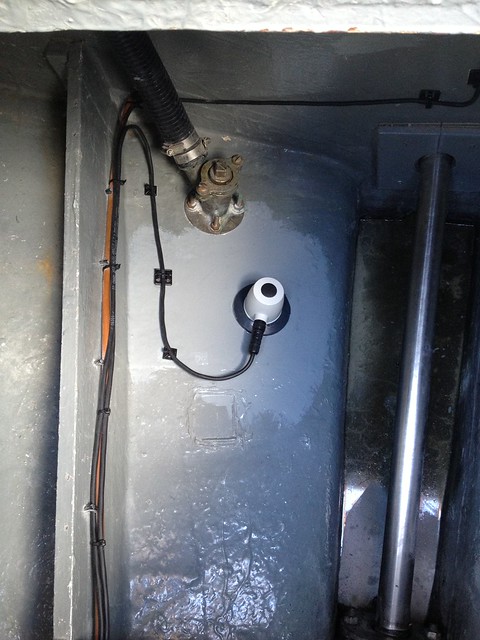
The cables from each of these transponders run back to the control unit which I fitted in the aft bulkhead of the engine compartment.
There are a couple of observations I would make about this particular kit. There are two cables supplied one 8 metres long and the other 4 metres long and these have plugs already fitted which means a 20mm hole needs to be drilled to enable the cable and plug to pass through any holes. However, and this is worthy of note, one end of the cable has a male plug while the other end had a female one..…….worth double checking before you run the cable in and find you have run it back to front as this would definately spoil your day!!
(Update: 16/4/13) In speaking with this company upon my return they have taken note of the above and will be making mention of the need to ensure the cable is run correctly within their manuals etc – excellent response and full credit to them for being so pro-active.
Rather than use silicone or sikaflex to fill the holes does anyone know of some kind of “bodge” material that is suitable to fill the holes but will not permanently seal the cables in – but will go firm enough to stop cable chaffing or water ingress?
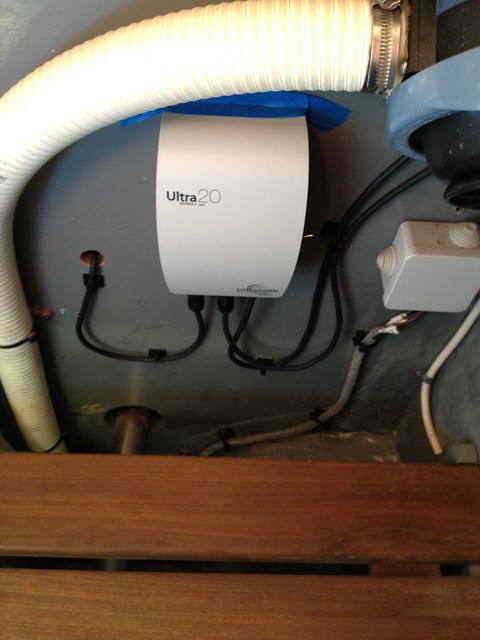
On Sun Dog (35ft) the 8 metre cable was just long enough, while the 4 metre cable was too long and I had to double it back on itself as you will see in the photo of the aft fitting.
I also wasn’t totally happy with the security of the control unit fitting onto the backing plate as it seemed (to me) likely to come off in rough seas therefore I put some tape across the top for added security.
Later this year I will have the boat lifted as I couldn’t get a lifting slot this week at the club. For the moment I have left the Ultra Sonic kit running 24 hours a day, as the solar panels will keep the batteries charged. The company say that the product is not meant as a means of getting rid of existing fouling and cleaning the bottom of the boat, however they do say that a difference should be seen after a period of six weeks has elapsed. I will let you know……….